How to Import Presets in Adobe Lightroom in 2024?

Download Lr APK 2024
Adobe Lightroom has become a favorite editing software among photographers due to its workflow, rich features and simplicity. Also, the professional presets it contains make it stand out from other editing software. These presets are editing adjustments that you can apply to your photos with a single click. If you’re new to Lightroom or just want to find the latest ways to import presets in 2024, this comprehensive guide will help you. It will be implemented in a phased manner.
Understanding Presets in Adobe Lightroom
Before diving into the import process, you need to understand what presets are and how these preset work in Lightroom. These presets are basically a collection of editing adjustments that you can use to achieve a certain look or style in your photos.
You may have to use different tools separately to edit an image. But these presets already include changes in exposure, contrast, color balance, etc. Which you can apply to your photos with just one click. Presets save time and ensure a cohesive visual aesthetic.
Installing And Importing Lightroom Presets On Lightroom Classic
Method 1: Installing Presets Using the “Import Presets” Option
1: First of all, Download Lightroom Presets. Presets are commonly available in .XMP file formats.
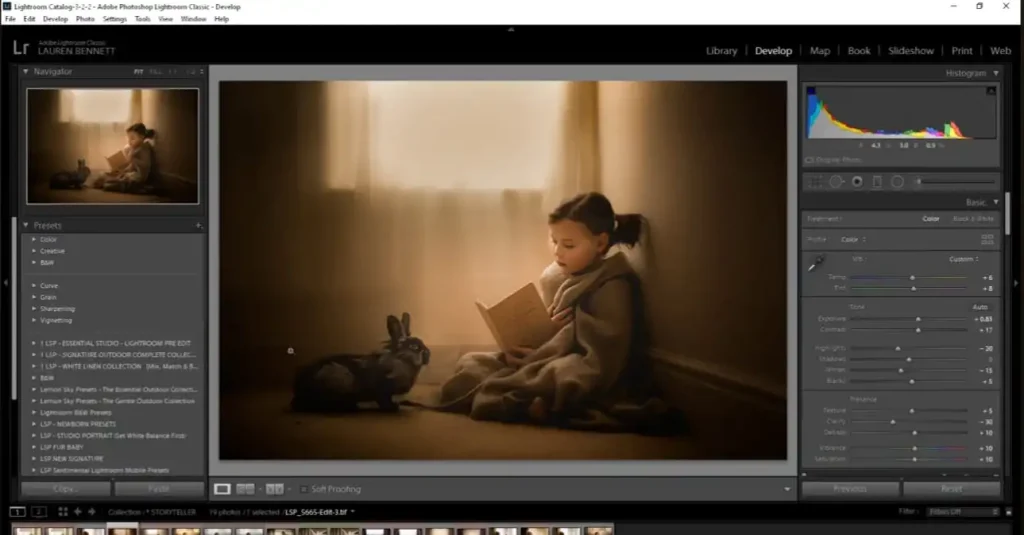
2: Open Lightroom Classic and click on the “Develop” module in the top right corner.
3: On the left side of the Develop module you can see a small triangle. Click on it and you will see the “Presets” panel.
4: Right-click on the “Presets” panel and select “Import.”
5: Install the preset file and click the import button.
6: Create a new folder to organize your presets. Name the folder and drag your downloaded preset into it.
7: Imported preset will now appear in the “Presets” panel. To apply preset on your photo just click on the preset name.
Method 2: Drag and Drop Presets into Lightroom Classic
1: Download Lightroom on PC after that download presets that you want to install on it.
2: Open the file explorer on your PC.
3: Select the location where you want to download the preset.
4: Select and import the preset file and drag them directly into Lightroom Classic.
5: Create a folder to organize your imported presets.
6: You can see your imported preset in the preset panel.
Method 3: Importing Presets via Lightroom Classic Preferences
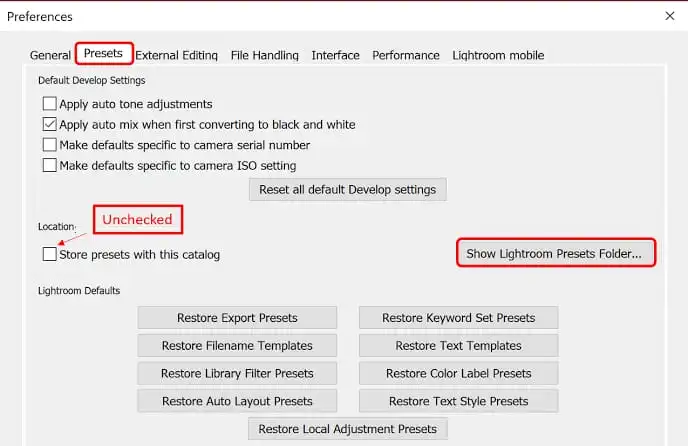
1: Open Lightroom Classic on your computer. In the top menu bar, select Preferences.
2: Click on the preset in the dialog box.
3: IN the Presets tab, there you can see the option “Show Lightroom Develop Presets.” Click on it.
4: Create a folder to organize your presets. Restart Lightroom Classic to ensure it.
5: Preset that you import will now be available under “User Presets.”
Import Lightroom Presets On Lightroom Mobile
Method 1: Synchronization with Lightroom Desktop:
Once you’ve imported presets into Lightroom Desktop/Lightroom CC, the presets are automatically saved to your Lightroom mobile app due to Adobe Creative Cloud’s cross-platform compatibility. Because your mobile apps connect to the cloud, you don’t have to worry about importing them to your mobile separately.
Method 2: Import using DNG files
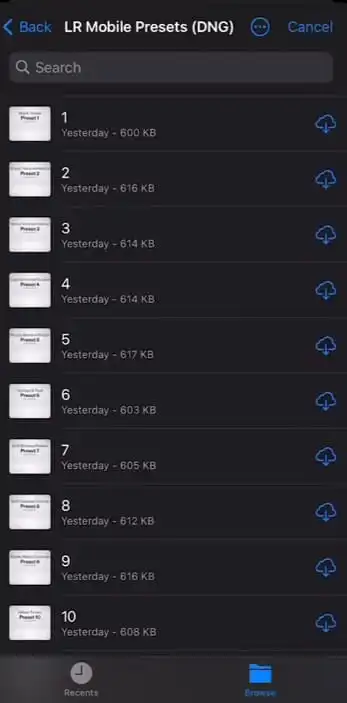
1: Download the Lightroom mobile preset in DNG format.
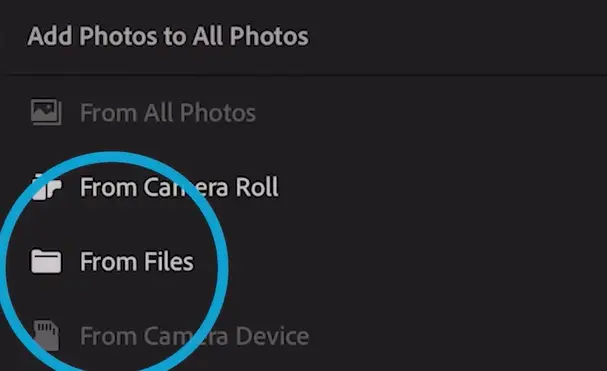
2: Tab the “+” icon to import DNG files
3: Select the “From Files” option.
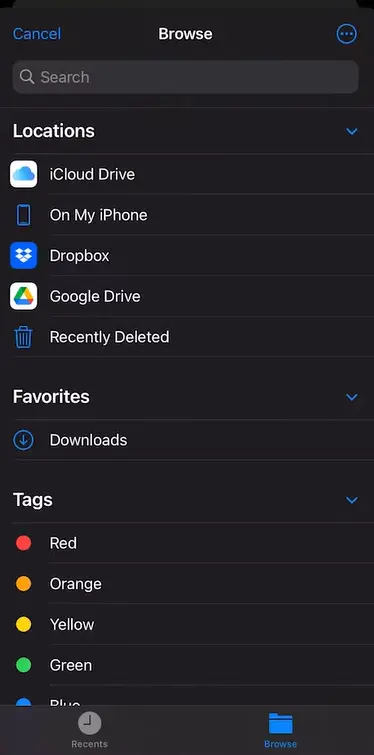
4: Open the folder where you downloaded the DNG files.
5: Select the DNG file You can select multiple files at once
6: Import them into Lightroom mobile after tab the import button.
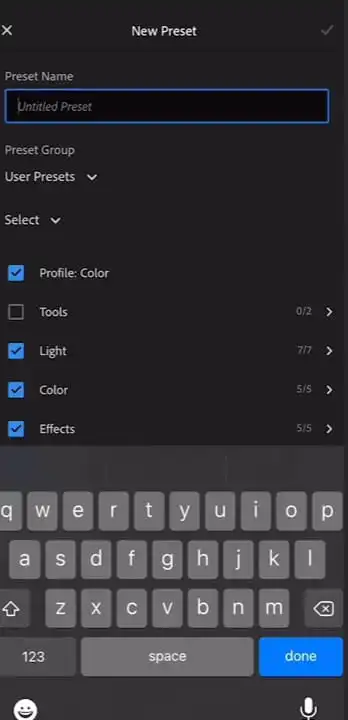
7: Select “Create Preset” in the options menu to save current editing settings as a preset.
8: You can see a dialog box. Give a name to your preset.
9: Click on the “Create” button to save the preset.

10: You can see that the newly created preset is available in your Lightroom Mobile Presets library. To apply it to other photos, select the photo and apply it to that photo with one click
11: After applying a preset, you can make additional changes to the image you want using the editing tools in Lightroom Mobile. Save or export the edited image when you are satisfied with the editing.
Import user presets (most recommended method)
- First of all, Download Lightroom on Android or iOS.
- Create a new project.
- You can see the Preset icon at the bottom of the screen, tab it.
- Click three dots at the top right corner for import presets.
- select the preset files you want to import. Navigate to the folder where preset files are located.
- Presets will be in DNG format. Tap on it to import the preset. You can import multiple files at once. Just tap the import or Add button to import into Lightroom mobile
- You can see the imported presets in the Presets panel, you are free to use presets
- To apply a preset to a photo, click on the preset name and Lightroom Mobile will apply the preset’s adjustments to the selected image.
Conclusion
You can import presets into Lightroom by following any of the methods described in the article. Presets enhance your photos and play your time. By understanding the functionality of presets and following the step-by-step instructions provided, you can streamline your editing process.
