“How to use Curve Tool in Lightroom”(2024)
The Curve tool in Lightroom is used by photographers to adjust the tonal range and color accuracy of their images. This is a powerful feature in Lightroom. If you learn to use this tool effectively, your editing workflow will improve. This comprehensive guide will take an in-depth look at the Curve Tool, how it works, and how you can take advantage of it.
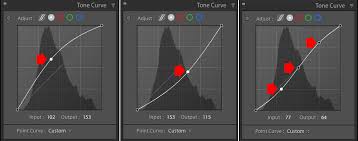
It is a powerful feature in Lightroom that is part of the Develop module. Users can get a graphical form of the tonal range of an image using this tool. With the Curve tool, users can make precise adjustments to shadows, mid-tone, and highlights in their images. By adjusting its area curves, image brightness and contrast can be changed, colors can be enhanced, and creative effects can be achieved.

Understanding the interface
The curve tool can be a complicated tool for new users. Professional photographers find their work incomplete without a curve tool. This tool is the center of editing activity. When you open the Curve Tool, you’ll see a grid with a diagonal line running from bottom left to top right. This line represents the relationship between the input values (the original tones) and the output values (the adjusted tones)
You need to understand input and output.
X-Axis (Input):
Let’s talk about input first. This axis represents the actual tonal values of the image, from black (0) on the left to white (255) on the right.
Y-Axis (Output):
The function of this axis is to display the adjustable tonal values, ranging from black (0) at the bottom to white (255) at the top.
Types of curves: (Curve tool in Lightroom)
RGB Curve:
Speaking of the RGB Curve, this curve adjusts the overall brightness and contrast of the image, affecting all color channels simultaneously.
Individual Color Curves (Red, Green, Blue):
These curves allow you to adjust individual color channels, useful for color grading and color correction.
How to use the curve tool:
1: Access to the Crew Tool:
First Download Lightroom in you Phone.
To access the Curve Tool, follow these steps:
Download most Lightroom and go to the Develop module
Develop module is present with Basic Tab.
Find the “Tone Curve” panel on the right side of the screen.
2: Adjusting the curve:
To adjust the curve must make the first points and click on the line to make points. When you drag these points from your place, the tonal range will be changed. This will give you an idea of how different adjustments affect the picture.
Adding points: Click on the presence line to add points where you want to make points will allow you to manipulate specific tones without affecting the entire curve.
3: Understand tone adjustment:
Shadow: The left part of the curves represents the shadow. If you move the left side downward, you will see the shadow in the picture is dark.
Mid-tones: The middle part of the curves affects mid-tones. Adjusting this area allows a subtle increase in overall brightness.
Highlights: Curved letters are prominent on the right. Raising this section brings highlights while reducing it makes them dark.
Practical Uses of the Curve Tool:
Enhancing contrast:
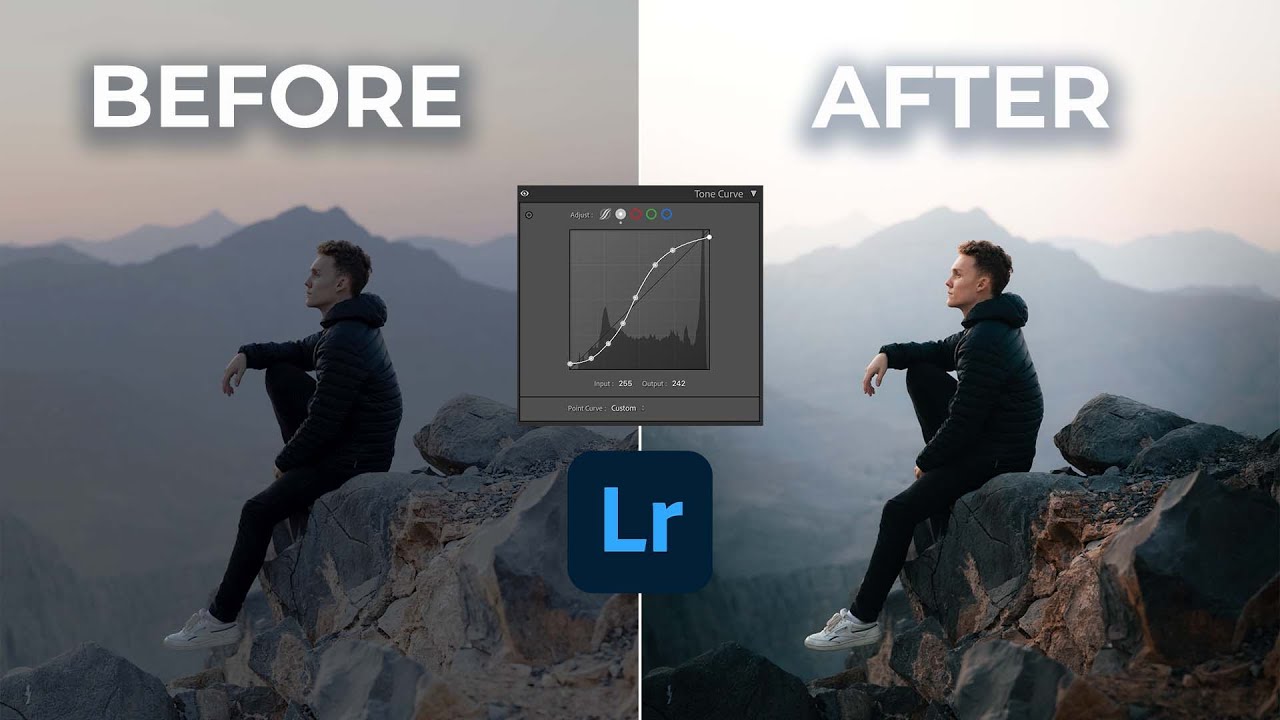
Understand that Curve Tool is a complete package, if you learn how to use this feature, you can do all the image editing with the help of this tool. This tool has many uses. That comes in handy during editing, but one of its primary uses is to increase or improve contrast in an image. Create an S-shaped curve to increase contrast. This allows you to increase the separation between highlights and shadows.
Adjusting the brightness:
If your image looks too dark or too bright, the Curve Tool can help you adjust it. You can adjust the brightness or darkness of your image without losing detail in the highlights or shadows by giving a slight lift to the mid-tones. This will make your photo look natural.
Color correction:
If you want to give your photo a vintage look, then The Curve Tool also offers creative possibilities. For example, if you increase the highlights and then decrease the shadows and mid-tones, the image will begin to have a vintage effect. Experimenting with curves can lead to unique artistic expressions.
Creative effects:
If you want to give your photo a vintage look, then The Curve Tool also offers creative possibilities. For example, if you increase the highlights and then decrease the shadows and mid-tones, the image will begin to have a vintage effect. Experimenting with curves can lead to unique artistic expressions.
Tips for using the curve tool
Use fine adjustments:
The Curves tool can be a great tool for making changes to your image, but remember that the deeper you learn and use the tool, the more beneficial it will be to you. It provides the best results for your image adjustments. Gradual transitions help maintain the natural look of your image.
Experiment with different curves:
Many users overlook the use of individual color curves, but remember that a slight adjustment in the red or green channel can completely change the mood of your image.
Monitor your histogram:
Always keep an eye on the histogram when using the Curve Tool. Because this process helps preserve details in your image and helps prevent clipping in highlights and shadows.
Combine with other tools:
If you combine the Curve Tool with other Lightroom tools for photo editing, you will get amazing results. For example, after using the Curve tool, you can further enhance colors using the HSL panel or adjust the exposure with the Basic panel.
Save custom curves as presets:
If you find a curve adjustment you like, save it as a preset for future use. This can save time in your workflow and ensure consistency in your images.

Common Mistakes to Avoid:
1: Avoid over-adjusting the curves, as this can make your image look unnatural. So always aim for a balanced look.
2: Don’t just focus on the RGB curve as this process can affect your creativity and limit your work. Remember to explore the individual color channels for more sophisticated editing.
3: Always check your histogram after adjustments to make sure you’re maintaining detail.
Conclusion:
For photographers looking to increase the tonal range and color balance of their images, the Crew tool is a very important feature in Lightroom. If you learn how to use this tool well, you can get the best results for your photos. Of course, the right use of this tool takes your editing work to the next level. Whether you’re making fine adjustments or applying creative effects.
This tool gives you complete control over color adjustments. With practice, you’ll find that mastering the Curve Tool can transform your editing workflow and help you create images that truly reflect your artistic vision. Start experimenting today, and don’t hesitate to combine the Curve Tool with other Lightroom features to unlock its full potential.

